What are Photograms?
Photograms are images that have been created without the use of a camera. The image is created by placing objects of your choice onto light-sensitive paper while in the dark, and then exposing it to light.
It was invented in the 1800's by a German professor named Johann Heinrich Schultze as he found out that silver salts turned white when exposed to the sun, and any parts that were not exposed stayed black. Other professionals used his experiment to later on create the photogram. These professionals include Thomas Wedgwood, Humphrey Davy, Nicephore Niepce, Louis Jacques Mande Daguerre, Charles Wheatstone, and William Henry Fox Talbot.

Source from: http://en.wikipedia.org/wiki/Johann_Heinrich_Schulze
How does it work?
While in a dark room, you place the objects of your choice onto the photographic paper in complete darkness unless you want to use low-lit red lights as the paper does not react to them. Once you are satisfied with your layout, you expose the paper to light for a few seconds. You then turn the light off, and develop the image while still being in the dark. You put the paper through a developer for 1 minute, then a stop bath for 30 seconds, and then a fixer for 2 minutes. You can turn the light on after this is done and then wash the chemicals off the image before leaving it to dry.
The image should come out with a black background where the light had been exposed to the paper, with the outline of your objects in white from where the objects have blocked the light from getting to the paper. Some objects will turn out white on the paper if they let no light through, and others can look grey if they let a bit of light through.
It turns out like this because the paper first starts out white, and turns black when it gets exposed to light. The objects you place onto the paper will block the light from getting to that section of paper, so when you take the object off you can see where it has been because it leaves it's outline on the paper. Some objects may allow some light through so that's why some of the objects can look grey.

1) Light shines onto paper
2) Object placed on paper blocks light from getting to it
3)Another object blocking light from paper
4) This section is black because light got to it
5) This section is grey because it partially got light through
6) This section is white because no light got to paper
7) Also white because no light got to paper
Source from: http://en.wikipedia.org/wiki/Photogram
What are advantages and disadvantages of Photograms?
The advantages of Photograms are you have complete control of the layout and design of your image so you can be as creative as you like.
It's a lot of fun and can be a hobby.
The disadvantages of Photograms are that you can't take a wide variety of photographs. For example, you won't be able to take portraits because it won't show the details.
It only shows the outline of images, so you can't see all of the details.
The photographic paper is quite expensive.
You have to go through a long process to develop the image so if it turns out wrong (like the objects not being shown) it can be stressful.
Examples of Photograms
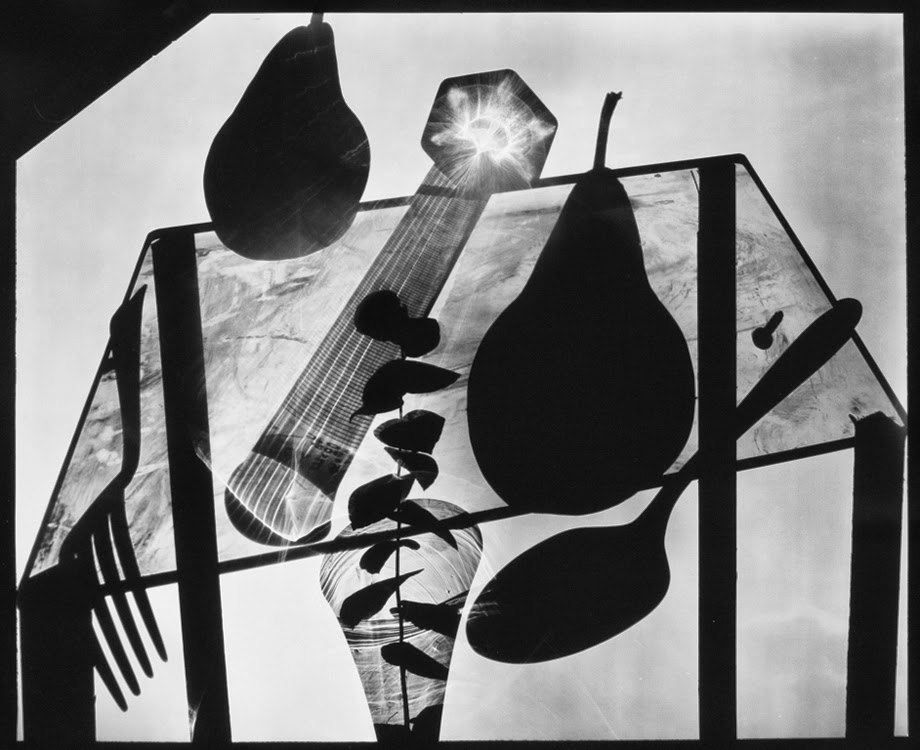
A photographer who I took an interest in was a man named Abelardo Morell. He is a photographer who's work has been in museums, galleries and even books.
He usually creates photograms using water and salt to create a "hand-made negative." He also scratches his film he uses to make the photogram to give it a variety of textures and volumes.
I liked his work because his images look as though he has taken a normal image in black and white, but if you look twice you can see he has just arranged objects to make it look like that. For example, the first image shown below this text looks like a weird landscape photo of a building, but when you look closely you can see that it's really a glass, a cup and so on.


Sources from: http://www.abelardomorell.net/posts/photograms/
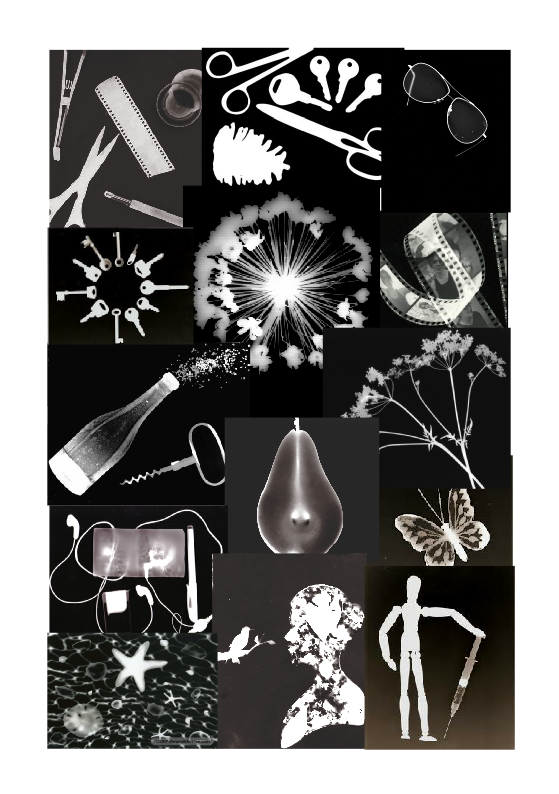
Another photographer that I liked was Dave Eva. He created photograms mainly of plants and flowers, and it really showed off the basic details of them.
I enjoyed his photos because the images looked simple and yet detailed. It gave me a new way of looking at the kind of flowers that are around in the world, and it is truly beautiful to look at. The images also made it look like they were of different objects. For example, the third image that is shown below this text looks like a spark, when really it is a plant called a Sea Holly.


Sources from: http://www.daveeva.co.uk/
Moodboard
Experimenting
Photograms was another technique I was able to experiment on.
I had a variety of objects set in-front of me that I could use, such as string, beads, necklaces, leafs, buttons, materials and so on. I chose some of the objects that I wanted to use and arranged it on a plain sheet of paper until I was satisfied with my layout.
Once I was happy with my layout, I went to the dark room. The photographic paper wouldn't react to red light so I switched on the red lights to allow me to see my objects. I switched the light from my enlarger on so I could see where the light would shine, and arranged my objects with the layout I had previously designed. This was so I knew where to put the photographic paper so it was set where the light was going to shine.
I then turned off the light and brought out the photographic paper. I arranged my objects onto the paper making sure it was in the right position, and then turned on the light for a few seconds before switching it off.
Afterwards, I took the paper and put it through the processing stages; first the developer for 1 minute, then the stop bath for 30 seconds, and then the fixer for 2 minutes. It was washed so the chemicals came off, and then put up to dry.
Here is the results of my photogram:
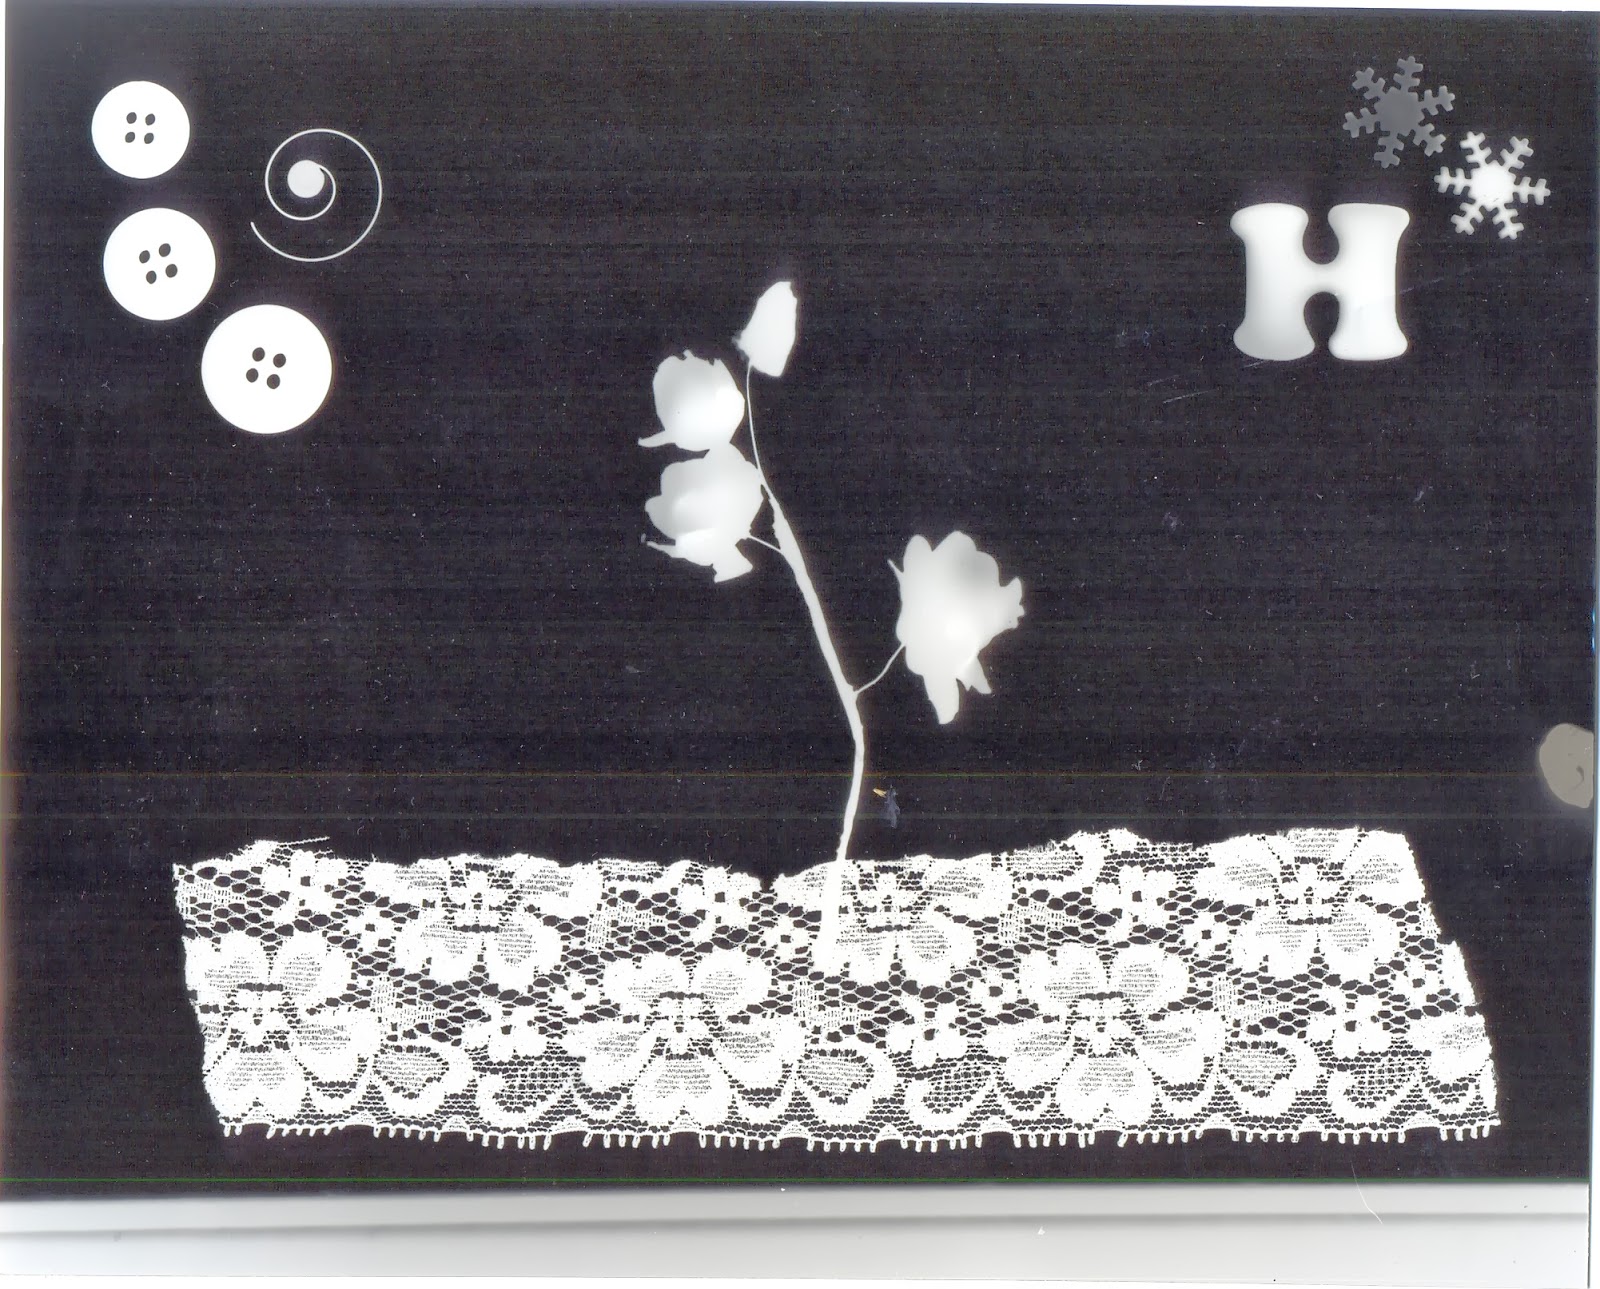
My image turned out quite well in terms of the exposure time. It had only black and white sections with only a few grey parts which shows I hadn't over or under exposed the image. All the areas turned out very bright which I loved about it. It made the lace and flower stand out. However, I didn't like the overall photo. The 'H' part was really random and didn't match with the rest of the image. I wish I had took my time and thought about how I wanted it to look instead of choosing any object I could find. Also, giving it a theme would give the image some meaning so if I was to do this again, that's what I'd do.
No comments:
Post a Comment